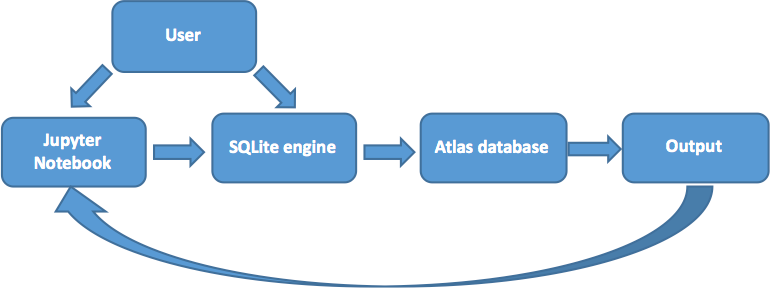
A relational database has been developed based on the original (n,n'γ) work carried out by A.M. Demidov et al., at the Nuclear Research Institute in Baghdad, Iraq [1]. For reference, the complete ATLAS is provided as a
The information from the ATLAS includes:
All of this is described in greater detail in the schema.
Taken together, this information allows for the extraction of the flux-weighted (n,n'γ) cross sections for a given transition relative to a defined value. In the examples presented here, we are currently using the fast-neutron flux-weighted partial cross section for the production of the 847-keV 2+1 → 0+gs transition in 56Fe, σγ=329.46 mb. This value can be changed to accommodate the user preference - see here for how to do this.
The (n,n'γ) data has been compiled into a series of ASCII comma separated value tables (the delimiter is a
The database can then be interacted with directly via the SQLite engine. We have provided a suite of Structured Query Language (SQL) scripts in the

The software provided with this package is intended to create a SQLite database on Linux and Mac OS X platforms. For Windows users, MinGW and Cygwin may provide a suitable alternative application environment/emulator (not tested). However, Windows-based environments have not been considered in the current project.
	      conda search seaborn
	      conda install seaborn
Also, Anaconda conveniently installs the Jupyter Notebook! To see a list of Python packages in your current environment simply type:
conda list
sudo port install sqlite3This is analogous to the
sudo easy_install pipThen to install a package:
pip install seaborn
This section is only intended for those who may need to install Python from the source or are missing some of the basic libraries required to use the Jupyter Notebook supplied with this package. The following procedures should only be considered as a set of guidelines rather than a strict set of rules and deviations may be necessary. But hopefully it provides a useful starting point, if needed.
	  tar -xvzf Python-2.7.13.tgz
	  ./configure
	  make
	  make install
exportPYTHONPATH =$ HOME /python exportLD_LIBRARY_PATH =/usr/local/lib:$ LD_LIBRARY_PATH
setenvPYTHONPATH =$ HOME /python setenvLD_LIBRARY_PATH =/usr/local/lib:$ LD_LIBRARY_PATH
sudo apt-get update#If it's been a while! sudo apt-get upgrade#sudo apt-get dist-upgrade sudo apt-get install python-numpy python-scipy python-matplotlib python-pandas ipython python-seaborn
pip install jupyter#Python 2 pip3 install jupyter#Python 3
	sudo xcode-select --install
	sudo xcode-build -license
	sudo port -v selfupdate
exportPATH =/opt/local/bin:/opt/local/sbin:$ PATH
	  sudo port install python27
	  sudo port install py27-numpy py27-scipy py27-matplotlib py27-pandas py27-ipython py27-seaborn
	  sudo port select --set python python27
	  sudo port select --set ipython py27-ipython
sudo port install py27-jupyter
To start the notebook server, execute one of the following commands from the terminal:
jupyter notebook# or... ipython notebook
The terminal will then display some information about the notebook server including the URL of the web application (default: